 Pin It
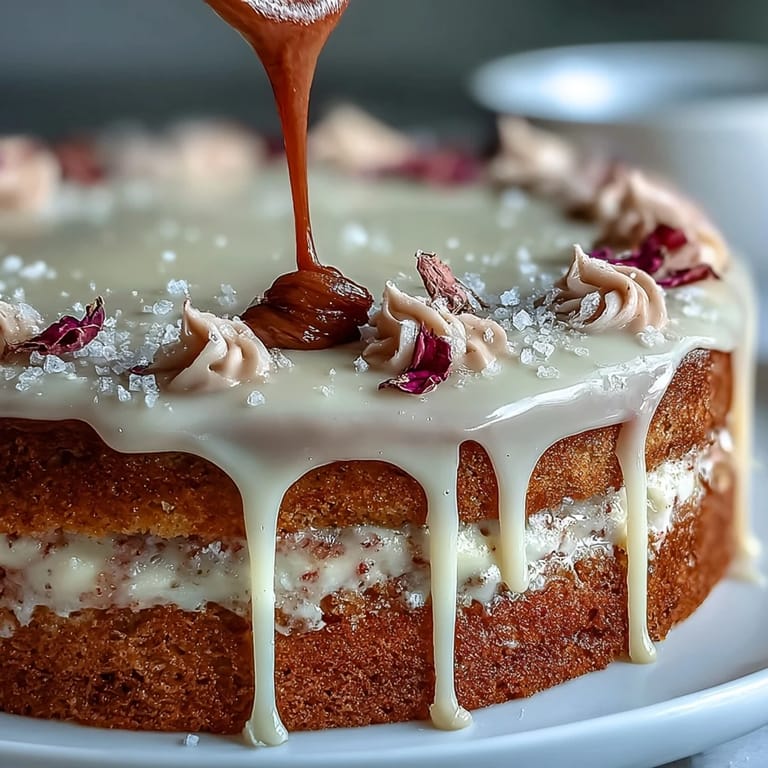
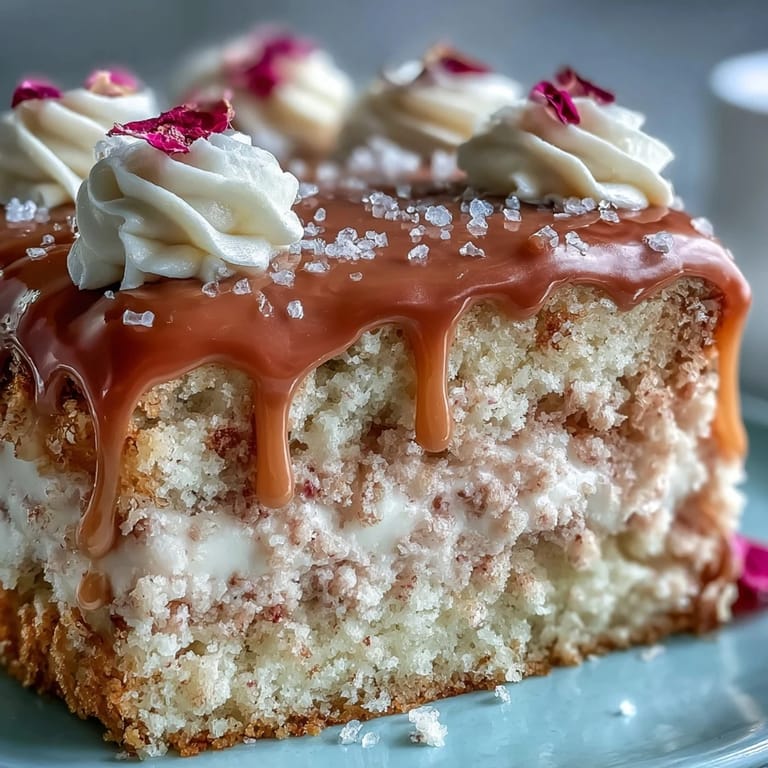
 The first time I tried infusing cake with rosé wine, I remember the sweetly floral aroma that floated through my kitchen as the batter came together, the anticipation making even my mixing bowl seem a bit more glamorous than usual. Every time I make this Rosé Velvet Cake, I laugh thinking how a splash of wine can make dessert feel like a celebration, even if it’s just a Tuesday. There’s something whimsical about transforming such a grown-up drink into a fluffy, blushing sponge—especially when you get to paint gold drips like you’re decorating a one-of-a-kind present. I never expected a bridal shower bake to turn into my go-to for any festive gathering, big or small. The cake blushes a delicate pink, and the gold drip always earns gasps when I bring it out of the fridge.
I made this cake for my best friend’s bridal shower, my kitchen filled with laughter, a tower of pink-edged bowls stacked precariously in the sink. Amid chatter and a few friendly arguments over song choices, I nearly forgot to add the cocoa—but caught myself just in time. As the cakes cooled, we stood around the counter tasting bits of golden ganache, both of us a little giddy from the fragrant wine and all the excitement in the air. When the finished cake finally came out, surrounded by flowers and friends, the bride’s eyes widened and I knew this recipe had worked its magic. It’s funny how a layer cake can anchor a whole celebration, just by being the prettiest thing in the room.
Ingredients
- All-purpose flour: Gives structure and balances tenderness—sift well to avoid dense spots.
- Cornstarch: Keeps the crumb especially soft, almost like bakery cake; just two spoonfuls makes a difference.
- Unsweetened cocoa powder: Adds depth and the signature hint of chocolate you want in a velvet cake.
- Baking soda: Ensures a gentle rise; make sure it’s fresh so your layers stay fluffy.
- Salt: Don’t skip—just a pinch amplifies all the flavors.
- Unsalted butter: Needs to be truly at room temp to whip up light and creamy.
- Granulated sugar: Gives the cake sweet lift and lovely crumb.
- Light brown sugar: Lends a subtle caramel note, especially delicious with rosé.
- Eggs: Bring richness and keep everything tender—room temperature helps the batter come together smoothly.
- Rosé wine: Choose something floral and fruity you’d happily sip; it perfumes the cake without overpowering.
- Buttermilk: Offers just the right tang and reacts beautifully with baking soda for airy layers.
- Vanilla extract: Warmth and depth in every bite—don’t be shy with your real vanilla.
- Pink gel food coloring: Totally optional, but a drop or two makes the color enchanting—mix in slowly to get your perfect blush.
- Cream cheese: Needs to be perfectly soft so your frosting is silky, not lumpy.
- Confectioners’ sugar: Sift to prevent lumps—smooth frosting is half the wow factor.
- White chocolate chips: For a glossy gold drip that’s sweet but not too rich—melt gently!
- Heavy cream: Turns those chips into a pourable ganache; a little goes a long way.
- Gold luster dust & clear vodka or lemon extract: This mix becomes gold paint—my tiny paintbrush always feels a bit like fairy magic here.
Tired of Takeout? 🥡
Get 10 meals you can make faster than delivery arrives. Seriously.
One email. No spam. Unsubscribe anytime.
Instructions
- Prep and Line:
- Preheat your oven to 350F (175C) and grease three 8-inch pans, lining the bases with parchment to guarantee a smooth release—trust me, this saves anxiety later.
- Mix the Dry Ingredients:
- Whisk flour, cornstarch, cocoa, baking soda, and salt until airy and even; you’ll see the powder puff ever so slightly, a sure sign no lumps remain.
- Cream Butter and Sugar:
- With an electric mixer, blend butter, granulated sugar, and brown sugar until light—watch for the color to turn pale and volume to nearly double.
- Add Eggs and Vanilla:
- Crack in the eggs one by one, beating well and scraping the bowl as you go; a drop of vanilla at this stage amplifies every aroma wafting up.
- Mix Wet Ingredients:
- In a jug, gently stir together the rosé and buttermilk—it’ll look a little swirly, which is just right.
- Combine the Batters:
- Alternate adding dry ingredients and your rosé-buttermilk blend to the creamed mixture, mixing just enough; fold in pink gel coloring for that blush-pink hue.
- Divide and Smooth:
- Evenly spoon batter into pans, gently smoothing tops for flat layers—steal a fingerful to taste, if you dare.
- Bake:
- Slide pans onto the middle rack and bake for 28–32 minutes, until a toothpick comes out clean or with a few moist crumbs.
- Cool:
- Let cakes cool in their pans about 10 minutes, then invert onto a wire rack; the scent is almost irresistible at this stage.
- Make Frosting:
- Beat cream cheese and butter until dreamy and creamy, then add confectioners’ sugar gradually; vanilla and salt lift it all to cloudlike perfection.
- Frost and Chill:
- Stack layers with generous swoops of frosting in between and around the outside; chill to set and conquer any crumbs.
- Create the Gold Drip:
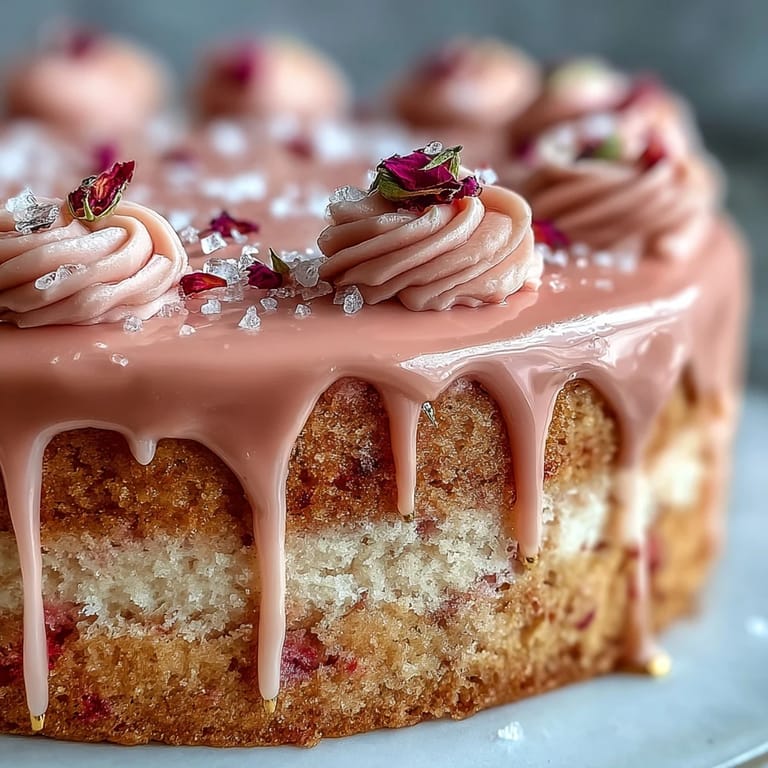
- Gently melt white chocolate chips with cream, let cool a touch, then coax the ganache over the edges so it drips like liquid gold.
- Paint it Gold:
- Once set, mix luster dust with vodka or extract to make edible gold paint, then brush each drip for pure bridal magic.
- Final Touches:
- Add edible flowers or a little gold leaf—just enough to make each slice feel celebratory.
 Pin It
 When the last edible petal went on, I caught my own reflection in a gold-tipped spoon, grinning like a six year old at her first birthday. Something about the shimmer, and the friend standing next to me, reminded me that sometimes the smallest celebratory touches turn a recipe into a memory that gets talked about long after the plates are cleared.
Getting the Pink Just Right
The gel food coloring goes further than you expect—start low and blend, as the color deepens as it bakes. For a subtler hue, I sometimes skip the food coloring and let the rosé’s color shine through with just a pale blush. You can even stencil little hearts or splashes with a toothpick if you want to surprise the guest of honor. The color always feels like a surprise when you finally cut in.
Chilling and Slicing for Clean Layers
Once the frosted cake is assembled, chilling for thirty minutes makes a world of difference—slices hold their shape and the gold drip stays perfectly set. I use an offset spatula to smooth the sides, and for extra sharp slices, a hot wet knife does wonders. If you’re traveling with the cake, chill it as long as you can before the journey. That bit of patience keeps your hard work picture-perfect from kitchen table to celebration.
Decorating Like a Pro (Even When You’re Not One)
A small brush and luster dust instantly transform your finished cake into something worthy of a bakery window, no artistic prowess required. If edible flowers aren’t available, I cluster berries or even pistachios for a hint of color and crunch, and guests always ask how I did it. The real trick is to have fun with the decorating—every drip, petal, and brushstroke adds your own unique signature.
- Keep extra frosting on hand in case you need to patch any crumbs.
- If gold paint is too thick, thin it with another drop of vodka until brushable.
- Always let chocolate drips set before painting to avoid smearing.
 Pin It
 It’s hard to beat a cake that sparkles and tastes as enchanting as a big celebration feels. Here’s to more slices shared, and more toasts made, with every pink and gold bite.
Recipe Questions & Answers
- → Can I omit the rosé?
Yes — substitute equal parts pink grape juice or sparkling cider to retain the fruity note and moisture without alcohol. Adjust sweetness slightly if using juice.
- → How do I get a deeper pink hue?
Use a concentrated pink gel food coloring or a small amount of beet powder for natural color. Add gradually until you reach the desired shade to avoid altering flavor.
- → How do I keep the layers from sliding?
Chill the stacked, crumb-coated cake for at least 30 minutes before final frosting and decorating. Ensure the cream cheese frosting is firm but spreadable; too soft a frosting will not support the drip.
- → What rosé works best?
Choose a dry to off-dry rosé with bright berry and floral notes. Avoid heavily oaked or tannic bottles; a light, aromatic rosé will complement the cocoa and cream cheese.
- → How do I make the gold drip safe and stable?
Make a white chocolate ganache with white chips and cream, cool slightly, then drip around the chilled cake. Mix edible gold luster dust with a few drops of clear vodka or lemon extract to paint the set ganache; use food-grade luster dust only.
- → How should I store slices and how long do they keep?
Cover and refrigerate slices for up to 3–4 days. Bring to room temperature before serving for best texture. For longer storage, freeze layers without gold decoration for up to 1 month.