 Pin It
 My neighbor Margaret showed up at my kitchen door one Derby Day morning with a tin of cheese straws still warm from her oven, and I haven't made a batch the same way since. She broke one in half to show me the shatter—that perfect crisp that comes from cold butter and confidence—and casually mentioned she'd been making them for forty years. I asked for her method, expecting something complicated, but it was delightfully simple: good cheese, good butter, and a food processor that does most of the thinking for you. Now every time May rolls around, I find myself reaching for the sharp cheddar and plotting which friends deserve a tin.
I made these the first time for a casual gathering, nothing fancy, just neighbors gathering to watch the race on a small television in my living room. Someone bit into one and actually paused the commentary to ask what was in them, and suddenly everyone was reaching for seconds while pretending to pay attention to the horses. That's when I knew these weren't just snacks—they were conversation pieces that happened to be delicious.
Ingredients
- Sharp cheddar cheese, freshly grated: Use the box grater yourself rather than pre-shredded, as the coating on bagged cheese prevents proper melting and binding.
- Parmesan cheese, finely grated: The nutty depth here balances the cheddar's sharpness and adds a savory complexity that lingers on your palate.
- Unsalted butter, cold and cubed: Cold is everything—it creates those pockets of steam that make the straws shatter instead of bend, so keep it in the freezer until the last moment.
- All-purpose flour: Don't sift it; just spoon and level, as overmeasuring creates a tough, dense dough that resists rolling.
- Cayenne pepper: Start with the half teaspoon and taste the raw dough on your finger to decide if you want more heat, because there's no taking it back once it bakes.
- Fine sea salt and freshly ground black pepper: These quiet the richness of the cheese and make the spice sing without overwhelming.
- Cold water, optional: Have it nearby but resist the urge to add it unless the dough truly refuses to come together—too much moisture is the enemy of crispness.
Tired of Takeout? 🥡
Get 10 meals you can make faster than delivery arrives. Seriously.
One email. No spam. Unsubscribe anytime.
Instructions
- Heat your oven and prepare:
- Set the oven to 375°F and line your baking sheet with parchment paper so the bottoms get as golden as the tops.
- Build the dough base:
- Combine the cheeses, flour, cayenne, salt, and pepper in the food processor and pulse until everything is evenly distributed and looks like sand. This only takes a few pulses—you're not trying to make a paste.
- Cut in the cold butter:
- Add the cold butter cubes and pulse again until the mixture resembles coarse crumbs with some pea-sized pieces still visible. Those little butter pieces are what create the flakiness, so don't overwork this step.
- Bring it together:
- If the dough looks dry, sprinkle cold water over it one tablespoon at a time and pulse gently until it just barely holds together when squeezed. The dough should feel slightly crumbly until you press it, then it should cooperate.
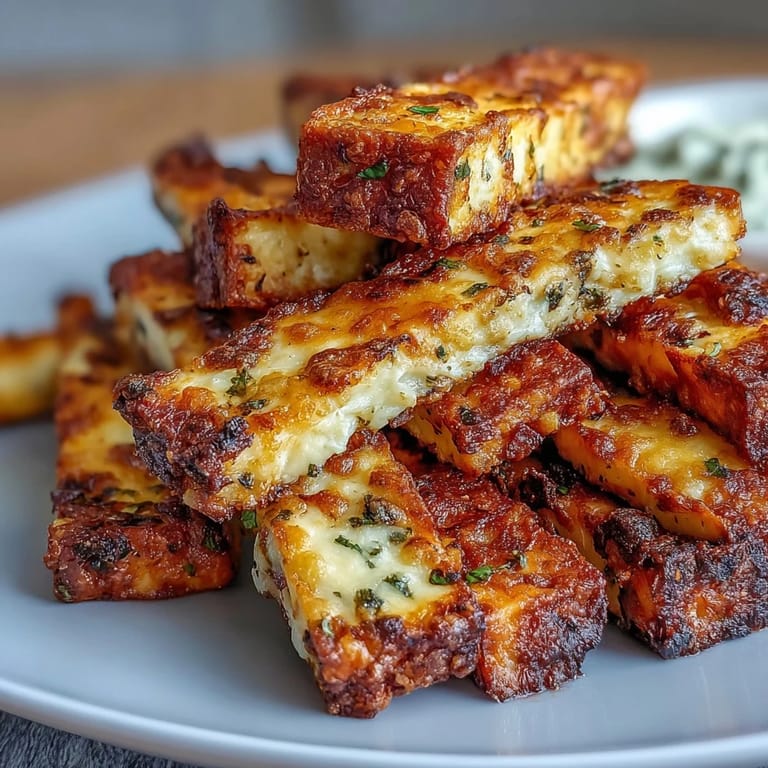
- Roll and cut:
- Turn the dough onto a lightly floured surface and roll it to about a quarter-inch thickness—thin enough to be crispy but thick enough to hold together. Cut into strips about half an inch wide and six inches long; this size is forgiving and impressive looking.
- Arrange on the baking sheet:
- Place the strips on your prepared sheet with a little breathing room between them so they bake evenly and don't stick to each other.
- Bake until golden:
- Bake for 12 to 15 minutes, checking around the 12-minute mark—every oven runs differently, and you're looking for deep golden edges with a slight shimmer from the cheese. The moment they come out of the oven is when they finish crisping, so don't pull them out pale thinking they'll harden as they cool.
- Cool properly:
- Let them rest on the baking sheet for five minutes to firm up, then transfer to a wire rack so the bottoms don't soften from residual heat.
 Pin It
 I watched my grandmother's face the first time she bit into one of these at a family gathering, and she just smiled quietly, which meant everything. Later she told me they reminded her of something her mother used to make, though hers never had cayenne, and we spent twenty minutes talking about how flavors travel through families and change with each person who makes them. That conversation meant more to me than anyone's compliments about the recipe itself.
Storage and Make-Ahead
These straws are best eaten the day you make them while the butter is still singing, but they keep in an airtight container at room temperature for three days without much complaint. If you want to get ahead, you can refrigerate the rolled-out dough for up to two days before cutting and baking, or even freeze the cut straws on a tray and bake them straight from frozen, adding just a minute or two to the bake time. I've done the frozen route on busy mornings and nobody could tell the difference.
Flavor Variations Worth Trying
The beauty of this base recipe is how it welcomes small changes without losing its soul. I've added smoked paprika, cracked black pepper on top before baking, even a pinch of garlic powder when I was feeling adventurous, and each version felt both familiar and new. Margaret once twisted hers into spirals and dusted them with fleur de sel, turning what was already impressive into something that looked restaurant-ready on a simple platter.
Serving and Pairing Ideas
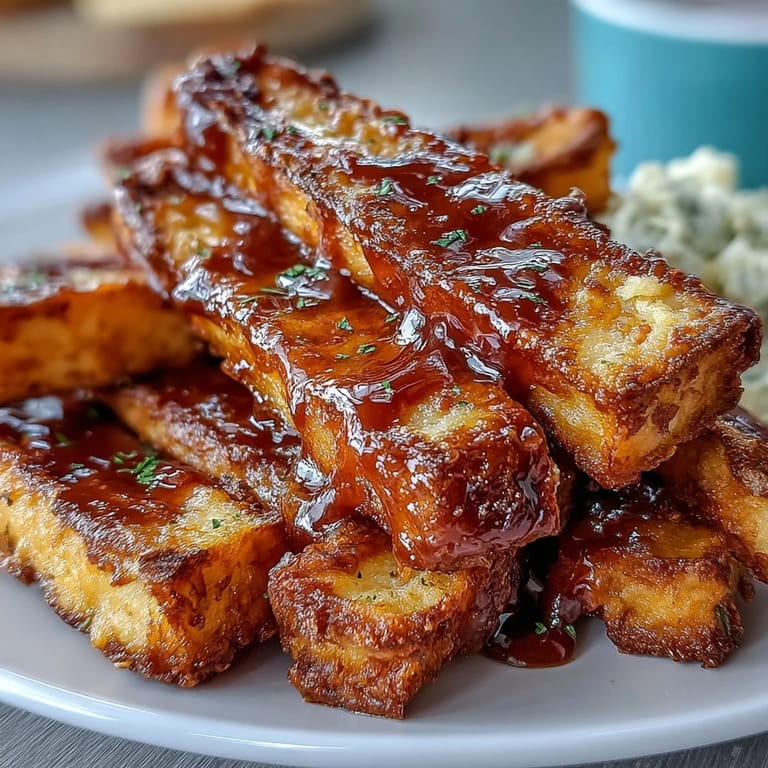
These straws are shameless about showing up to parties—they belong at Derby Day gatherings, certainly, but also on cocktail platters, next to soups, or eaten standing up in your kitchen because you made them and deserve a moment of peace. They pair beautifully with mint juleps as tradition suggests, but they're equally happy alongside a cold glass of wine or even a cup of strong black coffee on a lazy afternoon. My favorite way to serve them is piled loosely in a vintage tin or on a simple board with nothing else competing for attention, letting them be exactly what they are: simple, buttery, and impossible to stop eating.
- Serve them while they're still slightly warm from cooling if you want to catch that peak moment of crispness.
- If you're making them ahead, a brief five-minute warm-up in a 300°F oven will restore their crackle.
- Always make more than you think you'll need—they disappear faster than you'd expect.
 Pin It
 Every time I make these, I think about Margaret standing in my kitchen that morning, breaking that straw in half to show me what forty years of practice looked like. They're easy enough for a first-timer but interesting enough that you'll want to make them again, tweak them, share them, and maybe one day pass the recipe along with your own story attached.
Recipe Questions & Answers
- → What cheeses are used in Derby Day cheese straws?
Sharp cheddar and finely grated Parmesan provide a rich, savory flavor and crispy texture.
- → How is the spiciness balanced in the straws?
A small amount of cayenne pepper adds a gentle heat that complements the cheeses without overpowering.
- → Can I twist the straws for a decorative effect?
Yes, twisting the dough strips before baking creates an appealing spiral look and enhances texture.
- → What is the best method to ensure crispness?
Bake the strips on parchment paper at 375°F until golden and crisp, then cool on a wire rack.
- → Are there any suggested flavor variations?
Sprinkling smoked paprika on top before baking can add a subtle smoky aroma and deepen the flavor.